Crop tool is used to delete the unnecessary part of the image. By this you actually delete the pixel which you will not get back. So it is a destructible procedure. But there is another process to avoid this deletion of pixel. It is hiding the selection that you don’t want to show. The main advantage of this process is that it is non-destructible and you can get every detail when you want to get back. Also after making a selection if you don’t like it you can also change it, as all the details is still there.
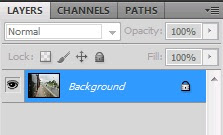
Now we will see how we can hide a selected part of the image. First open the target image with Photoshop. By default if you don’t take any extra layer then it will open in the Background layer. The trick to hide the selection of image required a layer that supports transparency. Background layer is a special type of layer and you can delete part of pixel in it also not support partial transparency. For the hiding trick you first you need to convert this Background layer into a layer that supports transparency.
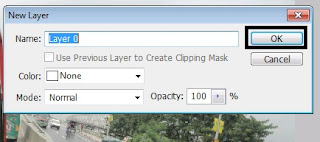
The quickest way to convert that just double clicks on the layer and on the shown dialog box you can give a new name and click ok. So the special Background layer converted into a layer that supports transparency.
Now again take the crop tool by pressing “c” or the crop icon. Just click and drag down on the picture and select your area of selection. But do not press enter or the return button. This will delete the pixels. After selection you will see on upper side crop option bar item been changed and you will see a delete option and a hide option like as follow.
Normally before selection you won’t see them. From these two radio buttons select the hide radio button and hit enter. You see the area outside your selection disappeared. But don’t think they are deleted. They are still there. Form this stage you can change your selection too. How? Select the move tool by pressing v or the move tool icon. Click on the image hold it and move it, you will see the image is also moving you see on your selected are the whole image is showing as window.
For getting back the original image from menu bar go to Image->Reveal All and you will get your image back.
So it is always better to use this hide trick instead of the cropping the image.


7 comments:
i love this post. thanks a lot
Background Removal Services
Thanks for share this post. Read More: graphicexpertsindia
It was nice. Thank you for sharing with us.
Amazing photo editing tips. Thank you for sharing with us.
Thank you for your tutorial on photo editing. Carry on.
great tutorial on image editing! Thank you.
Your article impressed me a lot. You explained it so clearly. Thank you for this
Best Regards,
Image Background Removal Service
Post a Comment